This post is also available in ITALIANO
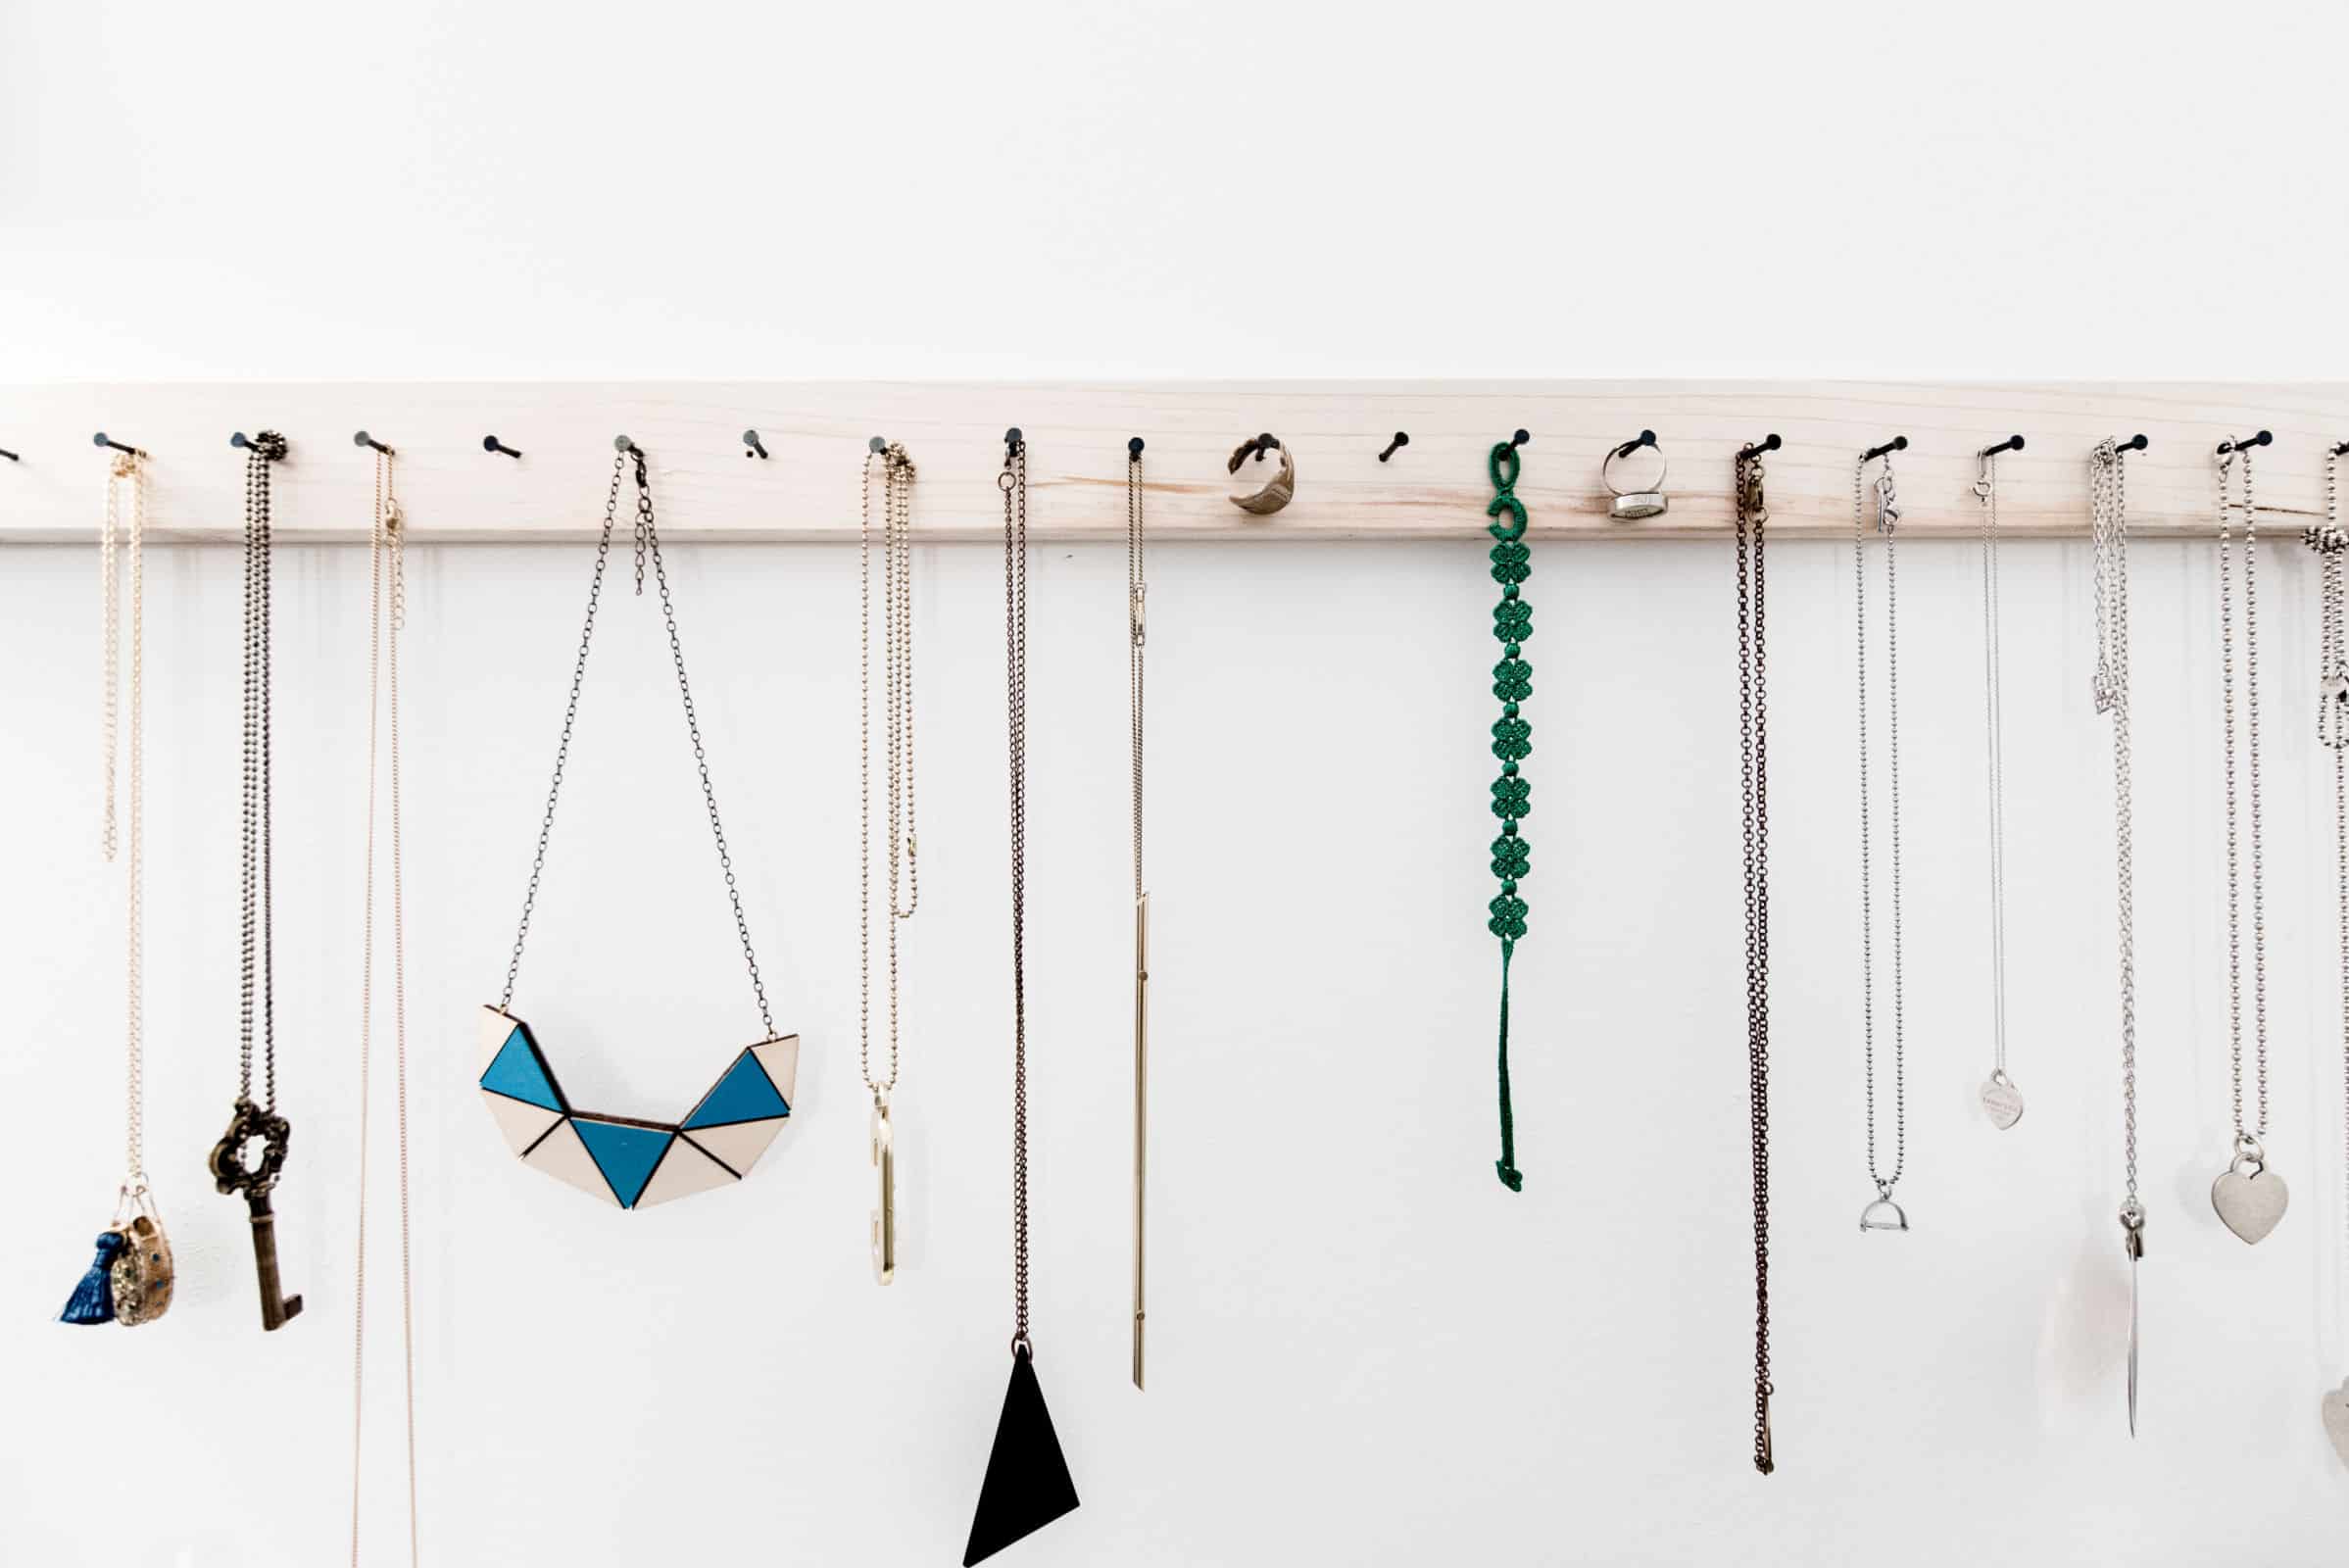
DIY necklace hanger. I live in a tiny house. And I’m messy. That’s why I need to find intelligent solutions to make the most of any space. I created this DIY necklace hanger to have all my necklaces within eyesight. Before leaving, a couple of drops of perfume and the final detail that makes me feel good. The alternative would be a crazy hectic search for the necklace I want followed by 10 minutes of tragedy spent trying to unravel the bundle of necklaces: 10 minutes that become 10 minutes late to my meeting, covered up by the lie: “I couldn’t find my keys!”.
In conclusion: a wall necklace hanger is the solution to a problem. I strongly recommend it.
Moreover, according to research, “crafting can help those who suffer from anxiety, depression, or chronic pain.”
Here is the tutorial to make it yourself, step by step. I anticipate that it’s disarmingly easy 😉
DIY necklace hanger

Ingredients:
- a wooden listel*
- necklaces
- nails (those to use with wood)
- scissors
- Pattex superglue
- paper tape
* the wooden listel you can find in any DIY shop. As an alternative I suggest you to find yourself a trusted carpenter and to recover his discarded materials 😉 Let’s start.

Step 1
Mark the listel in the middle with paper tape, so that you will be able to hammer the nails perfectly in line.

Step 2
Mark with a pencils the spots where you want to hammer the nails.


Step 3
Hammer the nails in the spots you just marked. Try to hammer them in as much perpendicular to the listel as possible.
Step 4
Remove the paper tape. 
Step 5
Get the right measurements on the wall, and remember to leave enough space for the longer necklaces as well. 
Step 6
Stick the glue to the back of the listel. 
Step 7
DONE! Now you can start hanging your necklaces.


| photography Davide Buscaglia |
What can I say? I’m very happy of the result. Now my bathroom feels much more welcoming and the necklaces are a perfect decoration!
If you want to see more of my house you can have a look here > home sweet home

Leave A Comment